AUDIOTUTS Updates |  |

| Open Mic: Tell Us About the First Time You Played in Public Posted: 05 Jul 2010 05:00 PM PDT Do you remember the first time you played or sang in public? Tell us about your first performance.
Each Tuesday we open our mic to readers and lurkers alike to come out of the woodwork and tell us your thoughts and opinion, your experiences and mistakes, what you love and what you hate. We want to hear from you, and here’s your chance. How did you feel before your first performance, and how did it go? What type of performance was it? Did it inspire you or discourage you? How long was it until you performed publicly again? Which instrument did you play? Do you have a story to tell?
|
| How to Create a ‘SuperSaw’ Combinator in Reason Posted: 05 Jul 2010 12:23 AM PDT As some of my recent tutorials have been very ‘reference’ based I thought I’d get back to some proper technique and try to listen to your requests. So in the next round of tuts I’ll be looking at how to create sounds and effects from specific genres.
In this tutorial I’ll show you how to create a ‘SuperSaw’ type patch in Reason. This sound has been used in many a trance and dance track and was originally made using the Roland JP-8000. This may not be exactly like the original and you may not be into trance but it’s a useful sound for any genre. Step 1: Create the Combinator and MixerSo where to start? Open Reason, empty your rack and create a fresh Combinator. Then insert a mixer as your first device. This will be automagically routed to the Combinator.
 The Combinator is born.
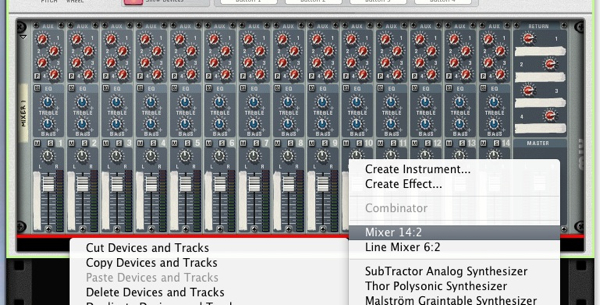 Swiftly followed by a mixer. Step 2: Create and Initialise a Subtractor SynthLoad a Subtractor, this will also be routed for you and should slot nicely into channel one of the mixer.
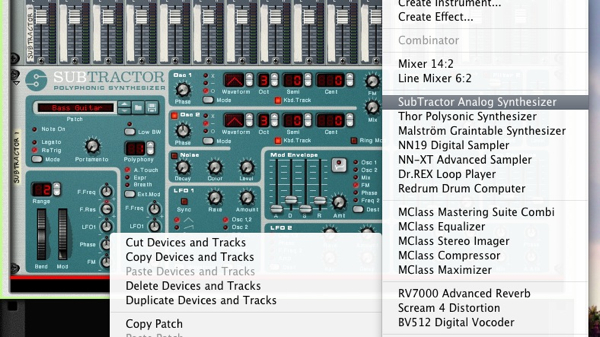 The Subtractor appears. Now load the Subtractor with my top of the line, awesome initialised patch.
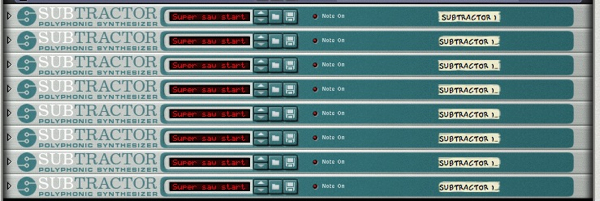
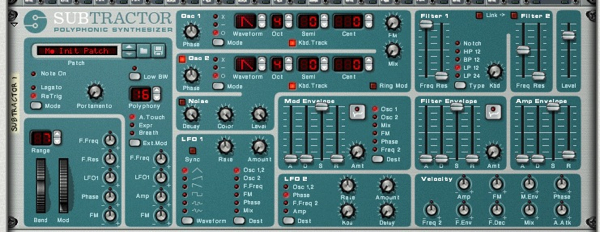 The initialised patch is loaded. Step 3: Duplicate the SubtractorThis is where things start to get heavy. Duplicate the Subtractor 8 times. Yes you heard me right, 8 times. This is the basis of the ‘SuperSaw’ effect and having 8 synths producing our saw waves will give us absolute and precise control over each part.
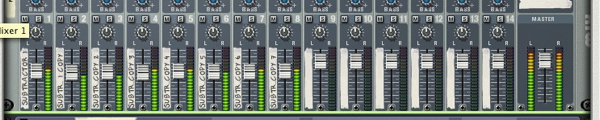
 The massive wall of Subtractors. It’s worth mentioning at this point that you can actually create this patch with as many saw waves as you like. Try 20, or even 100, if you’ve temporarily lost your sanity. Now make sure that each synth is routed to its own channel on the mixer, this will have to be done manually and is a slightly lengthy process.
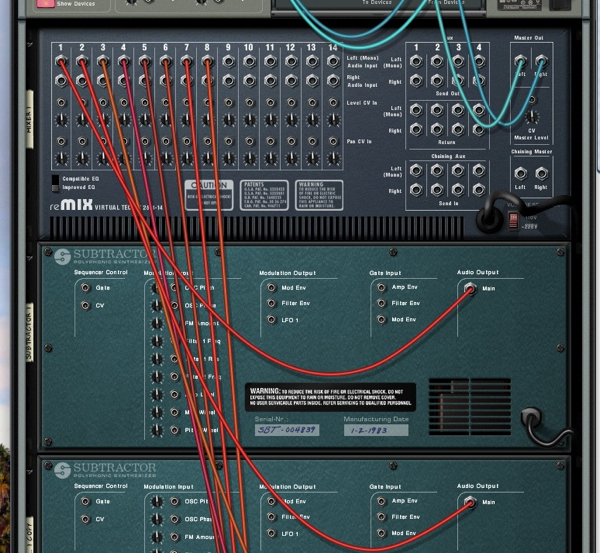 The routing is in place. Step 4: Isolate and Play the First LayerBefore we start to build the SuperSaw patch we need to get a basic pattern together. To do this I soloed the first synth using the mixer and played in a pretty standard trance type riff.
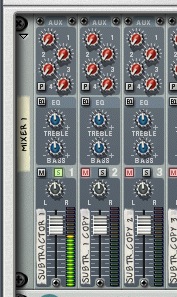 The first synth is solo’d. The riff was quantised and I was ready to go. You can hear how basic this sounds with one saw, not particularly interesting at all.
 The riff is laid down. The raw, single saw wave and basic pattern played back. Step 5: Edit the PatchTo get the patch going I performed some basic editing on the first synth. The filter was dropped a touch, some resonance added and a basic decay based filter envelope applied. I also raised the release of the amplitude envelope to make the sound a little ‘bigger’.
 The edited patch. The edited patch plays back. Step 6: Add Some Modulation and Distribute the Final PatchTo add some movement I linked the resonance and the cut off to the mod wheel and recorded in some controller data. This makes things a touch more interesting.
 The mod data.
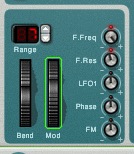 … And the mapping in the synth. The modulation playing back. The patch is now saved and ready to go. The next step is to load the saved patch into every synth in the list, this takes a little time but is a must! At this point you should make sure the MIDI is playing on the Combinator channel and not the original Subtractor, you may have to move it.
 Saving the patch…
 … and loading it into every synth.
 Make sure the MIDI is one the Combinator channel. Step 7: Detune and Pan the DuplicatesNow we get to the interesting bit and essentially the process that produces the ‘SuperSaw’ effect. We start by detuning every single synth in the list. The numbers don’t have to be exact here but I like to go from a minus number (-14 in this case) all the way through to the same positive number, in increments. So if you start at minus 14 cents on the first synth, you would then move through going -12, -8, -4… then +4, +8, +12 and so on. You don’t have to use these exact amounts by any means but the method would stay pretty much the same.
 The first four synths using negative tunings.
 … And the second four using positives. Next up I activated all the synths on the mixer and panned them in stages, using a similar pattern to the tunings. So hard left to hard right in stages. As you can see in the screenshot…
 The synths in mono… The SuperSaw effect in mono.
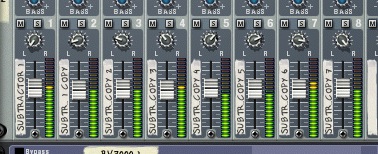 … and panned in increments, to create the stereo effect. … and now in stereo! Step 8: Add Some Effects and ProcessingFinally I added some effects to give it a larger more spacious feel. A delay based Combinator was inserted and a large reverb used as a send on every track.
 A delay Combinator is inserted.
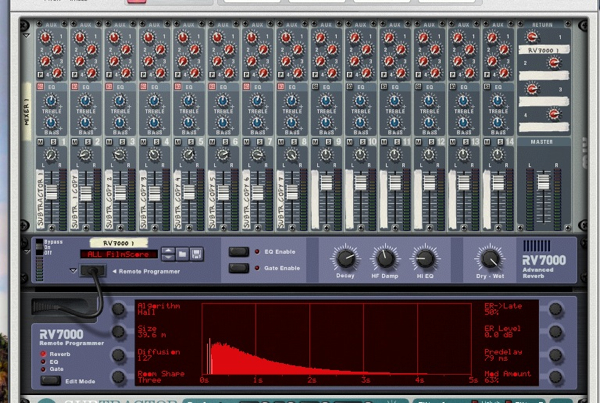 And a reverb patch is set up on a send / return buss. The SuperSaw with some spatial effects. The whole thing was then fed through some light mastering plug-ins just to control the dynamics.
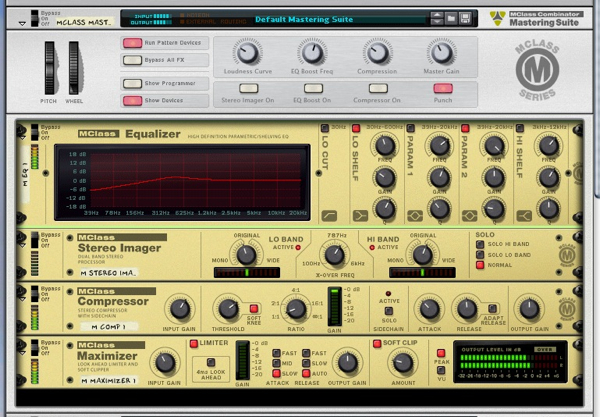 Finally some dynamics processing is added to the master buss. … and finally some dynamics processing is added.
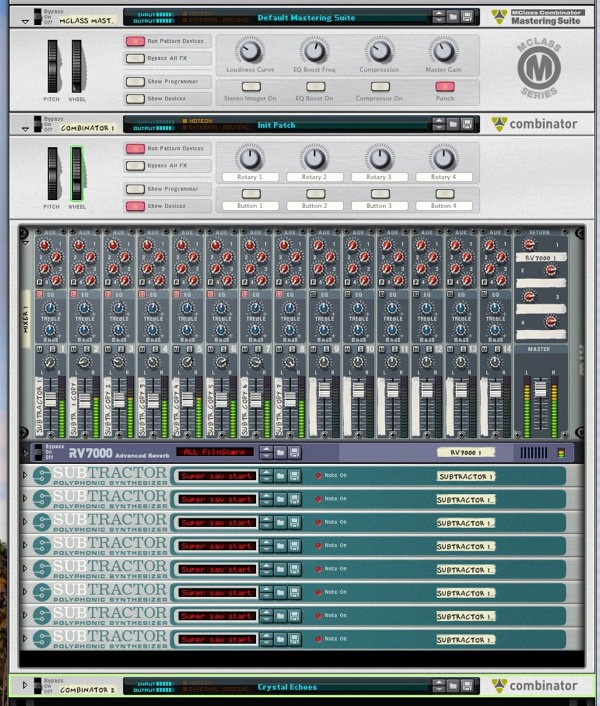 The final patch in action.
|
| You are subscribed to email updates from Audiotuts+ To stop receiving these emails, you may unsubscribe now. | Email delivery powered by Google |
| Google Inc., 20 West Kinzie, Chicago IL USA 60610 | |
AUDIOTUTS Updates Part 1
AUDIOTUTS Updates Part 1
AUDIOTUTS Updates Part 1
Tags: AUDIOTUTS Updates, AUDIOTUTS Updates watch online, full AUDIOTUTS Updates video, AUDIOTUTS Updates download, AUDIOTUTS Updates torrent, free AUDIOTUTS Updates, AUDIOTUTS Updates megavideo, AUDIOTUTS Updates full, AUDIOTUTS Updates eng sub
0 comments:
Post a Comment